A mechanical keyboard
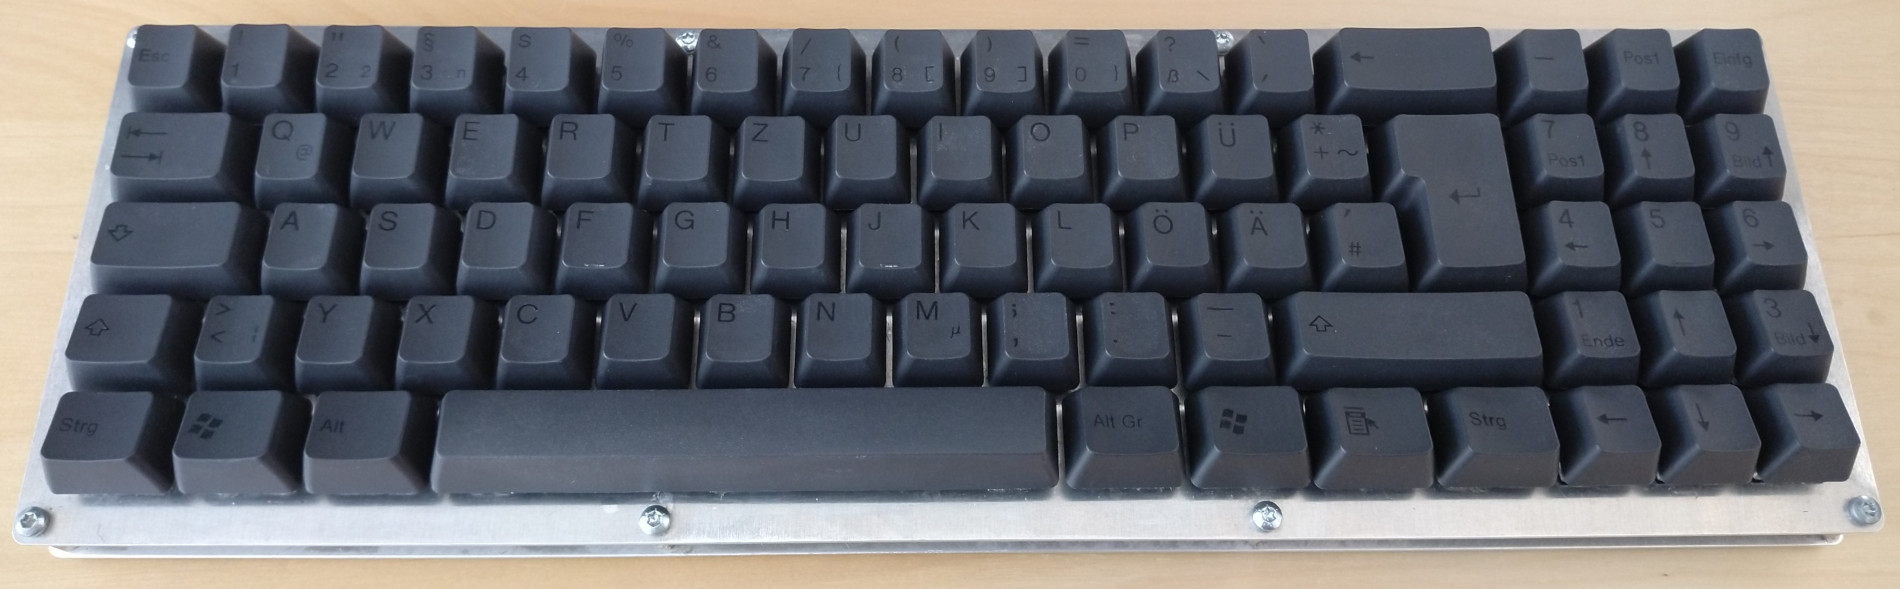
I built my own keyboard, which some people like to do because it’s fun or educational. My design decisions included getting rid of things I didn’t like or didn’t need and compacting everything to neatly packed 36x11 cm monolithic slab with a custom keymap.
Building details

Key layout and matrix wiring, view from the bottom
After the initial design work, I ordered two custom laser cut aluminium plates 1, some Tai Hao PBT black keycaps from Ebay, and Gateron brown switches from the UK. Then I soldered on the diodes and wires needed to create the keyboard matrix. And this may seem obvious for a keyboard, you need a lot of diodes and wires. So really this was not the best idea; besides all the time consuming wire-isolating, diode-bending and hand-soldering, the crammed and partially exposed wires can easily cause short-circuits, and mechanical stress can cause bad solder joints to break as well. I had to deal with these problems during the first weeks of usage, but at least I was able to go back in and fix the issues myself.
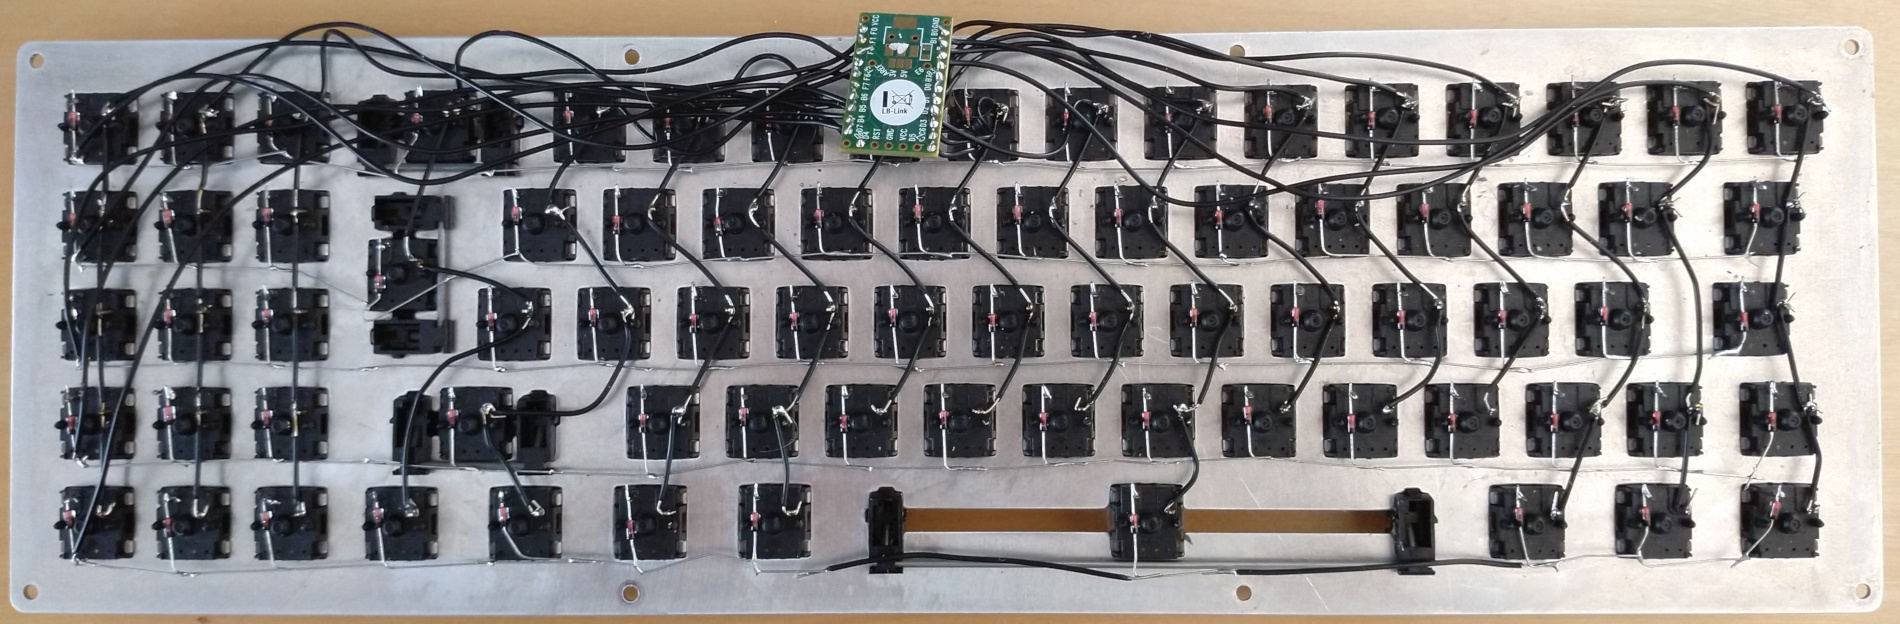
Yeah it's pretty disgusting...
The controller I used is a Teensy 2.0 with the fantastic TMK Firmware. I’d recommend the firmware 100% because it’s easy to use and pretty much feature complete for most users. I think I used this layout editor and some kind of keymap generator (maybe this one) to generate keymap definitions for the TMK firmware.
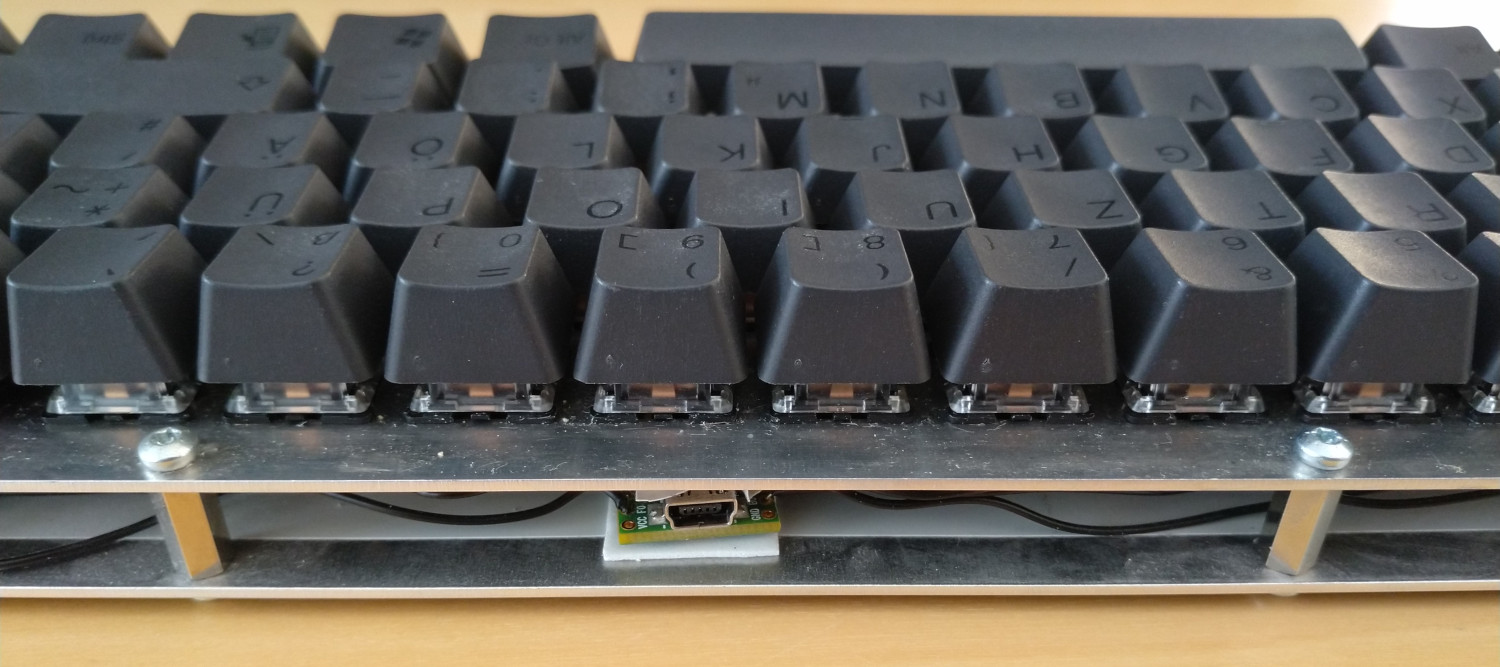
View from the back, the Teensy just sort of sticks on a piece of double-sided tape
Key layout
The otherwise useless capslock key is repurposed to a function key, similar to the ones laptop keyboards have. The topmost row of digits doubles as the “F1-F12” row when the function key is pressed. This works fine for the most part, as most people don’t use the F-Keys often anyway. For combinations like Shift+F5 you now need to hit Shift+Capslock+F5 which takes some getting used to.
The 3x5 block of keys to the right is more special. The key labeling mostly doesn’t match, so just ignore it. The topmost keys are delete, home and end; not too bad once you get used to it. Print, scroll lock, pause and insert are useless and won’t be missed. At the bottom we have the arrow keys as usual and page-up to the left and page-down to the right of the up-key. This was again inspired by laptop layouts and makes navigating large documents a lot easier. It ended up being one of my favorite design decisions.
Rows 2 and 3 from the top are assigned to function keys F4 to F9. My reasoning is that I use these keys a bunch for functions in IDEs, mostly for compiling and starting the program. This is easily the worst layout decision; the keys are way too close to other, more frequently used keys, so I always hit some F-Key by accident, and those keys typically do more things than just insert a character.
The bottom 4 rows also double as a numpad with the function key pressed down. This takes a while to get used too, but is actually fine; I don’t need the numpad that often, but typing numbers always feels easier on it than using the horizontal number row. However, if you forget to press the function key, you start hitting the F-Keys again.
You may have noticed the lack of a gap between the 3x5 block and the rest of the keyboard. As it turns out, the designers of the standard keyboard design may have had a point there – the gap helps with positioning your fingers on a tactile level. Personally, I just wanted the gap removed for aesthetic purposes.
In summary here are all the design flaws:
- Wiring is time consuming, often creates short circuits and bad solder joints may break easily
- Function keys on the 3x5 block are easy to hit by mistake
- 3x5 block on the right has no spacing, making it harder to “register” the arrow with your finger and easier to hit unwanted keys
- Not mentioned so far, but the open sandwich layout allowed dust and dirt to collect inside
- Also not mentioned, the controller is not mounted securely
Next time, I’ll definitely design my own PCB and figure out a better design with all the knowledge I gained from this project.
- I used this tool to generate the CAD files: http://builder.swillkb.com/ [return]